

How to Create Animated Graphics Inside Ecamm Live
Sep 07, 2022Creating Animated Graphics Using the Text Overlays
Ecamm Live allows you to create animated graphics and add different visual effects that will allow you to add in elements you'd normally only see in edited video content in your Ecamm recordings or live shows all natively built inside Ecamm Live.
If you haven't tried Ecamm Live yet, I highly encourage you to try it.
Click here for a 2-Month free trial! Use Diana2MOS code as you register.
In this tutorial, I'll walk you through exactly how you can create animated graphics and add different effects inside Ecamm Live.
Let’s Dive in.
⚡️ Pro-Tip ⚡️
To keep your show on brand, make sure that your brand colors and brand fonts are already installed on your computer.
I highly encourage you to know the right HEX code for your brand colors.
There is a lot of free online software tools that you can use to identify the exact HEX code of each color if you're not sure what they are.
How to Create Animated Lower Thirds
Let’s create a very simple but also very unique animated lower third.
Everything will be done in the Overlays panel in the Show in Current Scene section.
For the first part of this tutorial, I will create an animated lower third to my Just Me Scene.
Let's start by making sure that we keep our show organized.

Create a folder on the Overlays panel.
Click the folder icon located at the bottom part of the Overlays panel.
Rename the folder.
In this tutorial, I named it Diana Lower Third.
This way, I’ll know exactly if the folder is for me or for my guest.
We will be creating an animated lower third for your guest in the middle of this tutorial.


After creating the folder, click the arrow beside the folder to make it a drop-down arrow.
When the arrow is facing down, it will allow you to see and add overlays inside the folder.
Now, let's start creating the animated lower third.

Create a shaded box using the Text overlay.
Click the text icon at the bottom of the Overlays panel. It will open the Add Text Overlay window.
I deleted the default text and replaced it with "Back Image." I did this to simply name the box. You can put any text that you prefer.
Next, change the font color and the background color to make the text invisible.

To change the background color, highlight the text < go to Background < check the box on the Background tab to enable the background option < select the color that you prefer.

To change the font color, highlight the text < click the color icon < select the color that you prefer.
Make sure that the background color and the font color are the same to make the text invisible.
Also, make sure that the text has no effect.

To remove the effect, highlight the text < go to Effect < unchecked the box.

You can increase the size of the box by increasing the font size.
In this tutorial, I picked the font and background color Pink.
Click Add.
A Pink box will be added to your main screen.
Resize the box by dragging in and out the corners.
Reposition it at the bottom part of your screen.
But the pink box has no animation yet.
Let's edit the box and add animation.

Click the pencil icon to edit the box.
An Edit Text Overlay window will appear.
You can edit the corner of the box but in this tutorial, I’m leaving the corner of my box as is.
To add an animation, go to Style and choose your animation.

I chose Fly in From Right.
Click Save.
Let's test the animation.

To test the animation, click the eye icon beside your text overlay.
In this tutorial, when I clicked the eye icon, the box flew out to the right. And when I clicked the eye icon again, it flew back in from the right.
And that’s our first layer!
Are you following along? What animation did you use?
Let's go ahead and create our second layer.

You can duplicate the first layer or click the text icon on the Overlays panel to add another text box.
To duplicate an overlay, select the first layer on your Overlays panel < press and hold the Option button on your keyboard < drag it down using your mouse.
I renamed it First Image because it will be the top layer.
Let's change the color of the second box.

I changed the background and font color to White.
Hit Save.
A White box will be added to your main screen.

Now, we have two boxes, a Pink and a White box.
The White box should be on top of the Pink box.
Rearrange the boxes if they are not in order.

To rearrange the boxes, go to the Overlays Panel < drag one layer to exchange positions.

Always keep your Overlays panel organize.
Drag the two layers inside the Diana Lower Third folder.
Select the 2 layers and simply drag them into the folder.
Let’s go back and edit the White box.

Since it was a duplicate layer of the Pink box, they have the same setup.
Let’s edit the White box and change the animation.
In this tutorial, I changed it to Fly in from Top.
Click Save.
Test the animation.

Click the eye icon in the folder where the layers were added.
When everything was hidden, click the eye icon again to make the boxes appear.
In this tutorial, the Pink box flies in from the right and the White box flies in from the top.
Did you use a different combination of animations too?

Link the 2 boxes together so they will operate as a group.
Click the link icon in the folder, beside the eye icon.
How to personalize your lower third?
Now that we have the boxes, it's time to add text characters.
This time, we will make the text visible but it has no background color.

Remove the Background color by unchecking the check box option in the background tab.

Add a text overlay and rename it with your name.
In this tutorial, I put my name - Diana Gladney.

For the Font color, use a popping color.
The text will be placed on top of the white box so make sure it is visible and eye-catching.
I chose the font color Pink.

For the font style, let's design the text with 2 different font typefaces.
For my first name, I used Montserrat Medium.
For my last name, I used Montserrat Bold.
Click Add and see how it will blend on the text boxes.

Resize the text so it will fit inside the boxes.

Drag the text overlay inside the Diana Lower Third folder to keep your Overlays panel organized.
Don’t forget to add animation to the text.
Edit the text and add the animation that you prefer.
I chose Fly in From The Top.
Link everything together.
Lock the overlays too to keep them from moving anywhere on your main screen.
Always test your animation.

Since my animated lower third was added in the Just Me Scene, I went to the Countdown Scene first to run the show.
From the Countdown Scene, I waited until it transitioned to the Just Me Scene.
Linking the overlays together makes the transition smooth and neat.
In this tutorial, I achieved the animated lower third that I envisioned for my show.
If you get the chance to watch the video tutorial, you'll see how nice and neat it was.
I'm curious, how does your animated lower third goes? Did you achieve the animation that you envision for your lower third?
Animated Lower Thirds For You and Your Guest
Now that we already know how to create an animated lower third for you, let's create another one for your guest.
In this tutorial, I duplicated the Diana Lower Third folder and renamed it to Diana Lower Third +1.
I moved the Diana Lower Third +1 folder to the Show in All Scenes section temporarily.
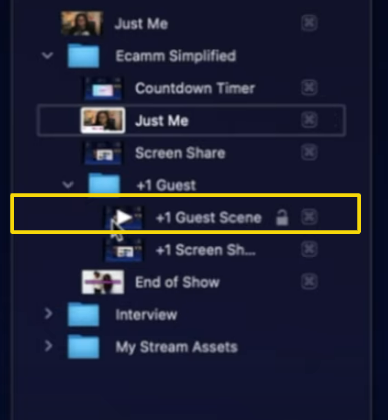
I already had a +1 Guest folder on the Scenes panel where I had 2 scenes created. I have +1 Guest Scene and +1 Screen Share scene.
I will add the animated lower thirds on the +1 Guest Scene.
Note: The one that I did was a shortcut. It will speed up the process so you don't have to recreate everything on the other scene.
Let's start creating your guest animated lower third.
Open your Guest Scene.
Since I moved the Diana Lower Third +1 folder on the Show in All Scenes temporarily, I will bring it down to the Show in Current Scene.
The animated lower third for your guest should only be seen on the Guest Scene.
⚡️ Pro Tip ⚡️
The more assets you add to your Overlays panel, the more you have to be organized to keep your show operating efficiently.
When you're bringing in a guest to your show, you'll both have a separate camera source.
I highly encourage you to create a folder for each of you.
Not only that it will keep your panels organized but also will help you systematize your show.
For my shows, I always create a folder for me and my guest.
In this tutorial, I created a folder for me being the host and named it Host Assets, and created another folder for my guest and named it Guest Assets.
Then, I moved the camera sources to their respective folders.

Don't forget to rename whatever you're adding to your Overlays panel so you'll know what it is and what it is for.
This way, it will be easier for you to find what you need for your show.
Let's proceed with creating the animated lower third for your guest.

On my Screen Share scene, you'll see my image with the animated lower third.
The animated lower third is huge and doesn't fit my image frame.
To resolve this, adjust the size of the boxes.

The shape of the boxes might change as you resize them.
This may happen because of the text that was added to the box.

Edit the box and remove some of the text.
When everything looks neat, duplicate your animated lower third.

To duplicate the animated lower third, simply press and hold the option button on your keyboard and drag it to the Guest area.
Ecamm automatically duplicates everything.
If you wanted to reposition the lower thirds and you can't find the perfect line using your mouse, simply hit the shift button on your keyboard < hold it while pressing the left or right button on your keyboard < move the lower third until you find the best position for it.

Rename the duplicated lower third and the text assets that were added to it.

I changed the folder name into +1 Guest Name and the text overlay into Guest Name.
⚡️ Pro Tip ⚡️
Always make your guest's lower third accessible.
I suggest putting it on top of the folders on your Overlays panel.
You will always change your guest's name as you bring in a new guest to your show.
How to Add a Scrolling Text Ticker
The scrolling text ticker is a great addition to your live stream.
You can put the scrolling text ticker on your Intro Scene at the bottom of your screen with the Countdown timer.
It will appear at the bottom of your screen as the timer rolls down.
It can be any message that allows you to connect with your audience.
It can be a call to action to get feedback from your audience or an announcement for your upcoming live shows.
In this tutorial, let's assume we had a call-in show and I want people to call and leave a voice mail at a specific number to share their feedback on my show.
I will put the scrolling text ticker in the lower third of my intro scene with the countdown timer.
Let's start creating the scrolling text ticker.

Go to your Intro Scene.
I named my intro scene the Countdown Timer scene.
In my Countdown Timer scene, the music and the timer are playing. My microphone was muted.
For this tutorial, I'm going to stop the timer and the music, and unmute the microphone while showing you how to add the scrolling text ticker so you would be able to hear and see everything that I am going to do.

Next, add a text overlay and add your message to the text box.
My ticker says, "Call in to 555 0123 to Leave Your Feedback!"
In this tutorial, I did not change anything on the background or on the font style but feel free to make the changes for your own design.

Before you add the text to your screen, go over to the Style tab and choose the Scrolling Ticker animation.
The Scrolling Ticker animation will allow your text to move continuously.
Click Add.

Drag it to the bottom of your screen. Resize it using the arrow icon.
You can change the speed of the scrolling ticker.
Make sure that the movement of the text is not too fast so your audience can read it clearly.

The Tortoise and Hare icon with the slider will let you control the speed of the scrolling ticker.
If you move the slider towards the Hare icon, the text will scroll faster.
If you move the slider towards the Tortoise icon, the text will scroll slower.
Make sure that the slider is near the Tortoise icon so the movement is just right for people to read your message.

You can also add an Emoji to your scrolling ticker to make it look better and personalize.
Edit the text overlay and click the emoji icon at the bottom of the text overlay area.
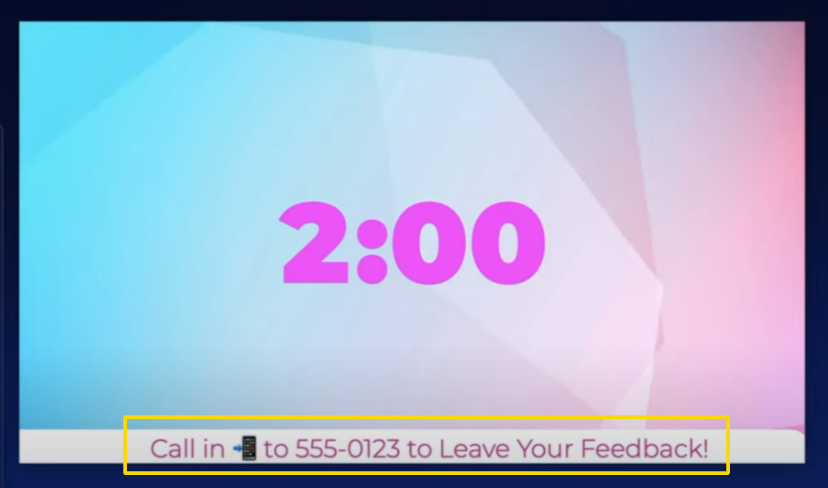
Since I am asking them to call me, I added a phone emoji.
Test your scrolling ticker.
Now that we've achieved the scrolling ticker that we envisioned, we can resume the timer and the music, and mute our microphone.
My intro scene is operating the way I envisioned it!
What does your intro scene look like? Did you add a scrolling text ticker too?
Animated End of Show Scene
Now that we have animated lower thirds for you and your guest and a scrolling text ticker on your Intro scene, it's time to create a unique way to end your live stream.

Go to your End Show Scene.
My end show scene was named End of Show.
For this tutorial, I made some adjustments to my end show just like in the intro scene.
I stopped the music playing and unmuted the microphone while showing you how to add animated graphics to your End Show Scene.
Let's create a shaded box again.

Add a text overlay.
We will be doing almost the same that we did on the animated lower third but on the text box let’s just add a period “ . “
Make sure that the text and the background color are the same to keep the period invisible.
Remove the effects.
Add animation.
I added Fly in From Right animation to my overlay.

This time, make the borders of the box pointed.
Go to the Corners tab and adjust the Corners using the slider.
Click Add.

A small Pink box will be added to your screen.
Adjust the size of the box until it covers half part of your screen.

Since the box is covering your image and the Thank you message, we will make it transparent.

To make the box transparent, press and hold the arrow down key and the Shift key on your keyboard.
After you get the opacity that you want, duplicate the Pink box.

To duplicate the box, press and hold the Option button on your keyboard and drag it to the other side of your screen.
You might be asking why we need to create 2 boxes instead of just one big box.
Hold on! We're not done yet.

Edit the second Pink box.
Change the background and the Font color.
I changed it to Gold.
Edit the animation for each box.
For the animation of the Pink box, I added Fly in From the Right.
For the animation of the Gold box, I added Fly in From the Left.
Can you imagine the transition between the two boxes? One will come from the left and the other one from the right.

Create another folder on the Overlays panel to make things organized.
I renamed the folder Shaded background.
Select the dropdown arrow and bring the two box overlays inside the folder.
Don't forget to link them together.

The Thank You message is not visible because it was at the bottom of the boxes.
Bring it on top of everything.

Move the Shaded Background folder underneath the Thanks for Watching overlay.
Or, move the Thanks for Watching overlay on top of the Shaded Background folder.
You can do it either way!

It looks better now.
But let's make it more visible.

To make the Thank You message more visible, let's adjust the background opacity of the text.
To adjust the background opacity, edit the text overlay < go to Background < open the Colors < use the slider to adjust the opacity.
I didn't make the opacity 100% so it would still have a little transparency.

Don't forget to add animation to your Thank You message.
I added the Fly From Bottom animation.
Click Save.

You can also add the Thank you message in the Shaded background folder to make your Overlays more organized but make sure that it is on top of the shaded boxes.
This is also a great way to make the animations function smoothly.

Leave the image overlay at the bottom of everything.
We will not put it inside the Shaded Background folder so it stays as a background image as the transition happens.
When I hide the Shaded Background folder, the image will remain on the screen.
Now, test how your End Show animation works.
If you got the chance to watch the full video tutorial, you would be able to see the unique and neat transition on my end scene.
How about you? What does your end scene look like?
What does your overall show look like after adding the animated graphics?
